Enabling Maximum CPU Power in Windows 10
In order to use maximum CPU power in Windows 10, you will need to perform the following steps:
Type control panel in the search section of your taskbar and click on the search result to launch the control panel window. The newly opened Control Panel window is shown in the following image:
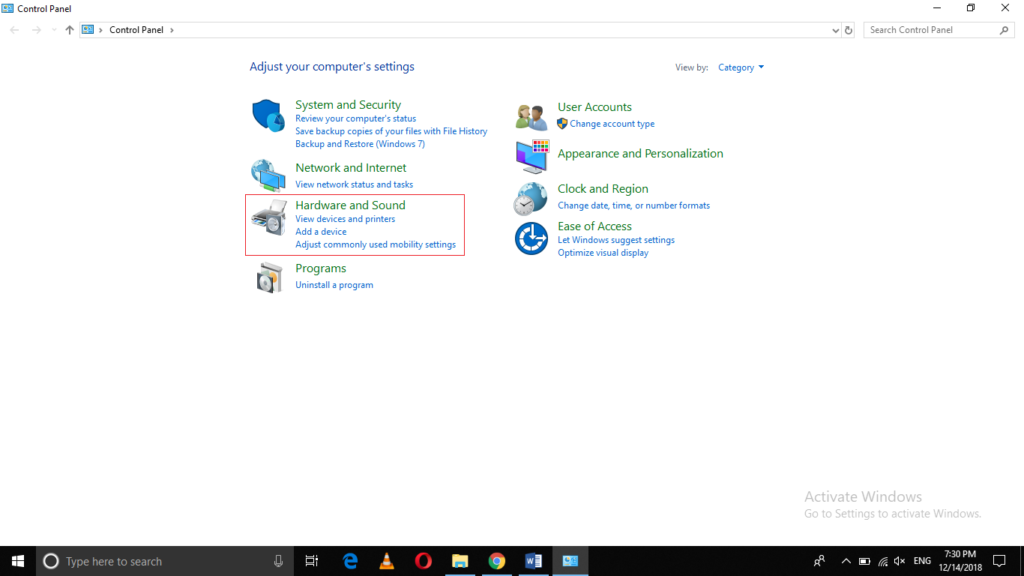
Click on the Hardware and Sound tab as highlighted in the image shown above.
Now click on the Power Options tab as highlighted in the image shown below:
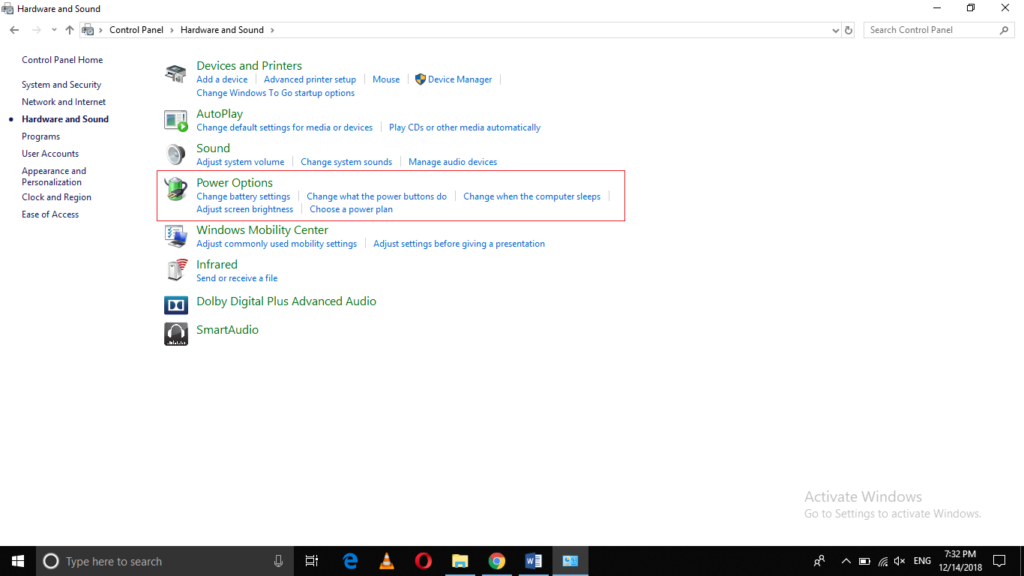
Click on Change Plan Settings link as highlighted in the following image:
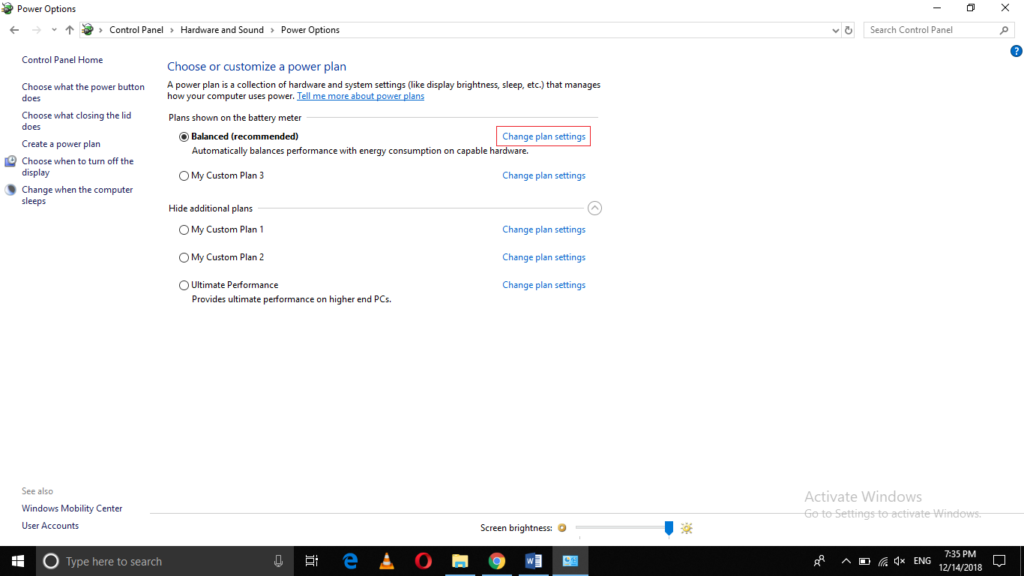
Now click on Change Advanced Power Settings link.
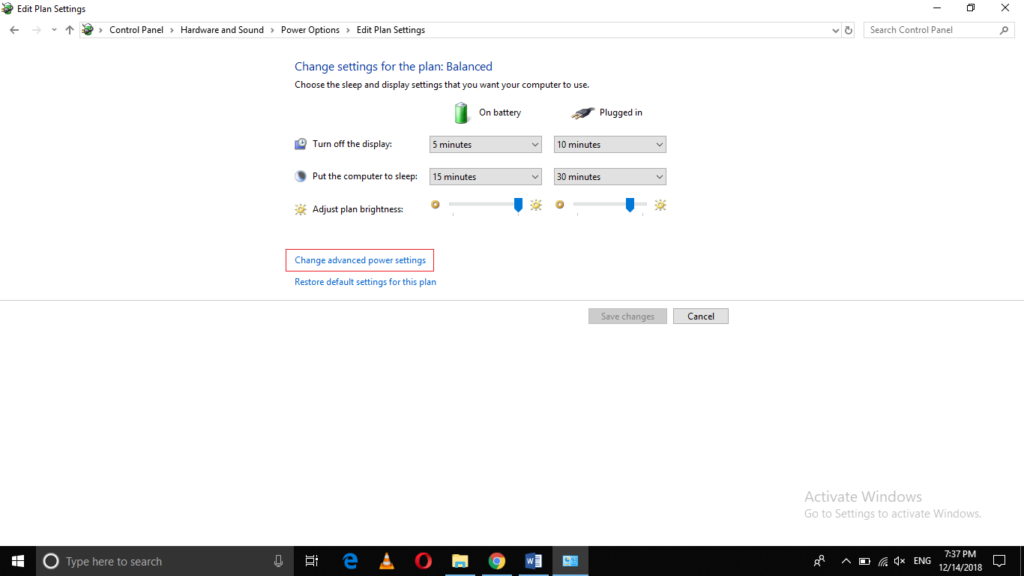
As soon as you will click on it, the Power Options window will appear on your screen as shown in the image below:
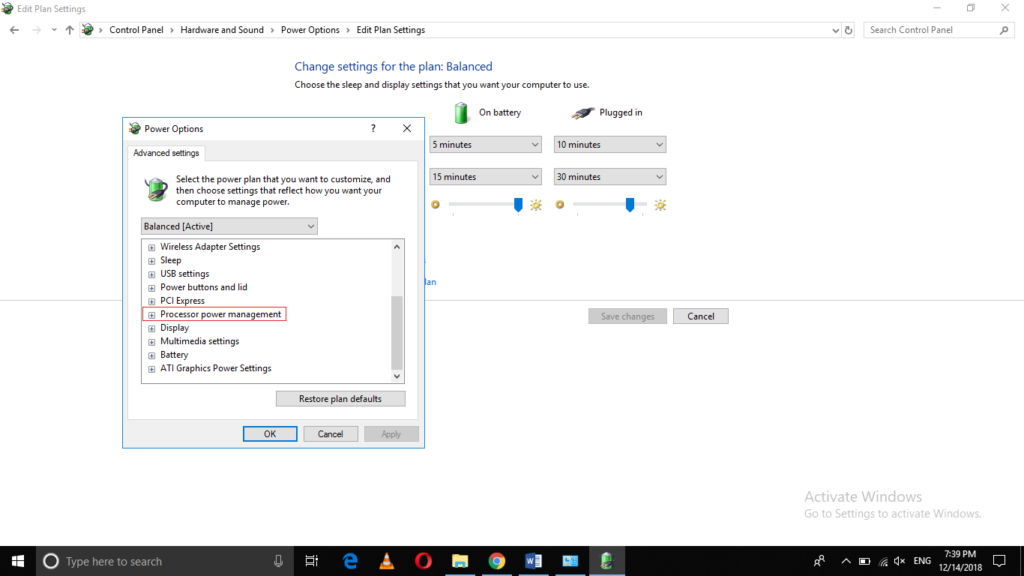
Now click on the Processor Power Management tab in order to expand it as highlighted in the image shown above.
Click on the Minimum Processor State tab as highlighted in the following image:
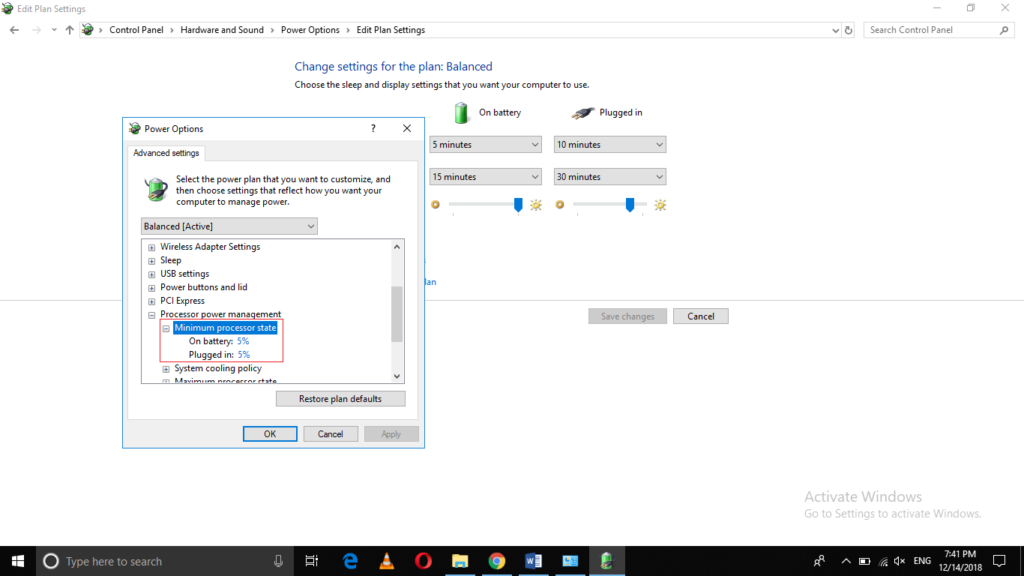
Select 100% for both the “On Battery” and “Plugged In” fields.
Finally, click on the Apply button and then click on the OK button in order to save your settings.

No comments:
Post a Comment