Problem 4- Cannot complete the Brother Software Installation because it stops when a screen for connecting the cable appears
If you are also encountering this problem with your Brother printer then you need to click the connection type you are using and follow the steps given.
- Network connection
- USB connection
#1: Network Connection (related models only)
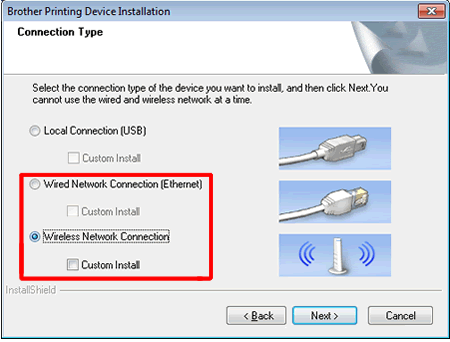
The issue might appear if a wrong connection type is selected during installation. So click Cancel to exit the installation and run the installation again.
And when the Connection Type screen appears > select Connection Type you are looking to use.
#2: USB Connection
Also, the issue may appear if your PC won’t recognize your Brother printer. So here you need to check the given points:
1: Your Brother printer might not be turned on.
Check if the power cord is properly connected to your PC and printer and also the printer is turned on
2: The USB cable may not be connected to your machine and PC properly.
Verify the position of the USB slot on Brother Printer and computer, and reconnect the USB cable.
If in case the PC identifies your machine > click Next on Connect the machine screen > click Next > continue the installation.

3: Your PC might not recognize your Printer
If in case both the options won’t work for you, then it might happen your PC may not recognize your Brother Printer.
- Check if the USB cable is connected to the USB hub then connect it right between Brother Printer and PC.
- If you connected the USB cable earlier the installation asked you then try the given steps:
- First from the Brother Printer > disconnect the USB cable
- Then to close the installation screen > click Cancel on Connect the machine screen
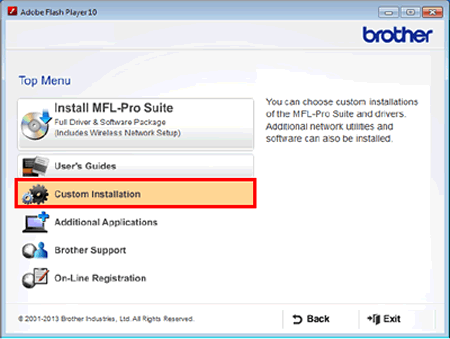
- Now put the DVD-ROM into CD-ROM drive again. And when screen appears click Custom Installation
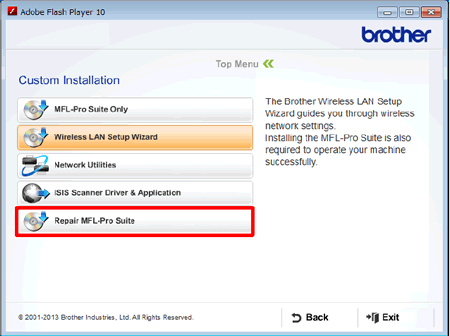
- And then click Repair MFL-Pro Suite. And follow the on-screen instruction.
4: Assure the Device Manager recognizes your Brother machine.
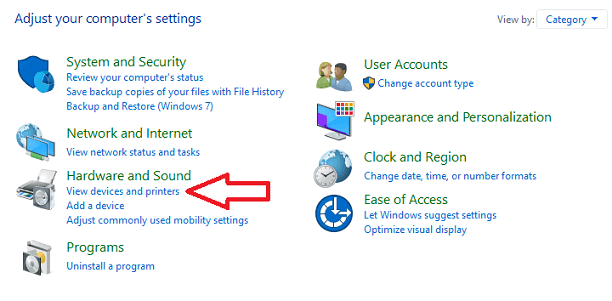
- Click on Start button > open the Control Panel.
- Then click Hardware and Sound under Devices and Printers section > click Device Manager
- And as the User Account Control screen appears, follow the steps:
- Users with admin rights > Click Continue or Yes.
- Users if not having administrator rights > Enter the administrator password > click OK.
- Click Processor > check if AMD is shown under Processor.
- Then choose View > Show hidden devices.
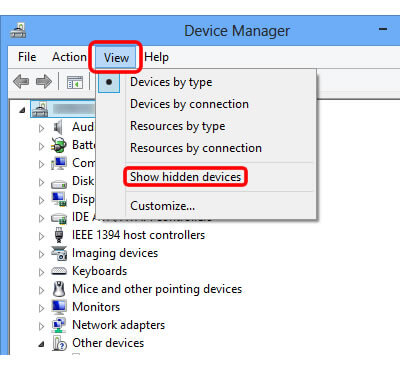
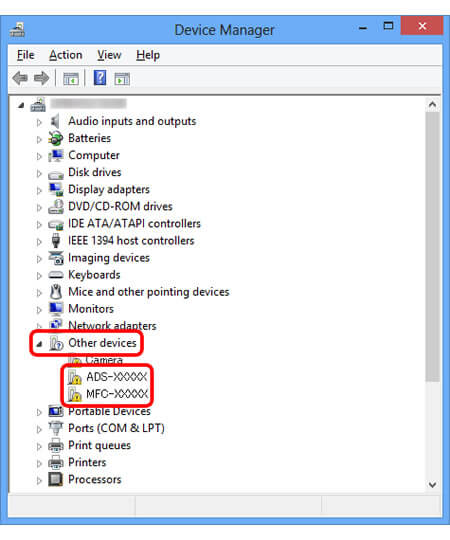
- And click the triangle mark or + next to Other Devices.
- Next right click on the yellow mark with the Brother Printer name > choose Uninstall > close Device Manager
- And disconnect Brother Machine > restart the computer.
- As the computer star
- After restarting the computer, retry to install the software. And try using USB 2.0 cable or USB 2.0 port of your computer.
I hope this works for you to resolve cannot complete the Brother Software Installation because it stops when a screen for connecting the cable appears issue.
Problem 5 – Brother Printer Driver is Unavailable
Sometimes users are found reporting the printer stooped working and showing error the brother printer driver is unavailable.
And to fix it you need to try uninstalling Brother Printer Driver and if this won’t work for you then update or reinstall the printer driver.
You can follow the steps from the above mentioned steps to uninstall and reinstall the printer driver.
So, these are some of the common Brother Printer Driver installation problems on Windows 10 with its solutions.
Now below check out the ways to update the printer drivers in Windows 10
How to Update Printer Drivers in Windows 10?
Below check out the three-ways to update the printer drivers in Windows. The given steps work for different brand printer drivers like Brother, Panasonic, Dell, HP, and others
- Update Printer Drivers Manually
- Update the Printer Driver Automatically
- Use Windows Update for New Drivers
#1: Update Printer Driver Manually
In order to update the printer driver manually go to the manufacturer website and check if the printer model supports Windows 10. If it supports then simply download and install the latest Windows 10 printer driver.
Or else you can also update the driver from the Microsoft official website compatible with your Windows 10.
You can also update the printer driver manually by following the below-given steps:
For some printers, you need to update the drivers manually step by step.
- Open Control Panel and in the right side select View by small icons
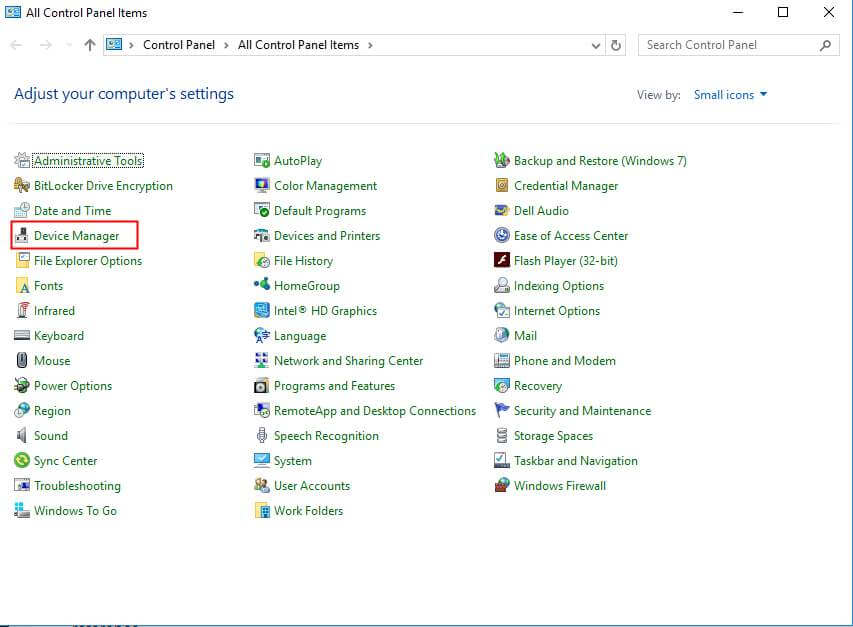
- Open Device Manager and locate the printer device that you want to update the driver for. And for problematic device > you can see a yellow mark next to the device name.

- And right-click on the device name > choose Update Driver Software…

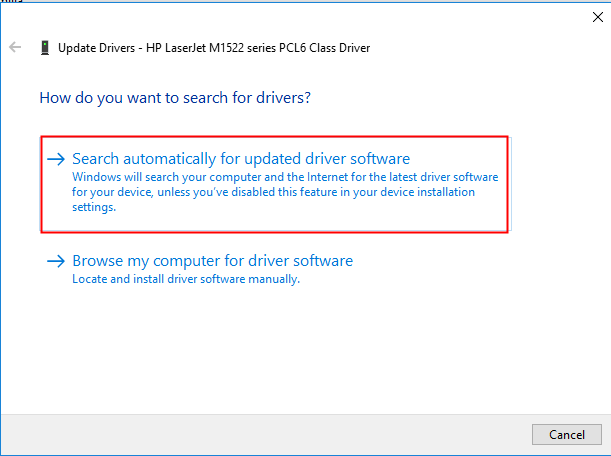
- Then in the pop-up window, you will see two options.
- It is suggested to choose the first option Search automatically for updated driver software. And follow the instructions to install the drivers.
- But if you have driver files presented on the computer, then select the second option Browse my computer for driver software.
And that’s it your printer driver is updated.
#2: Update the Printer Driver Automatically
If you don’t want to follow the tedious manual steps to update the printer drivers. Then you can do this easily by running the automatic Driver Update Tool.
You can run the Driver Easy to update the driver automatically. This scan your Windows computer and update device, printer drivers easily.
#3: Use Windows Update to Update Drivers
Here learn how to use Windows Update to update the drivers. Follow the steps to do so:
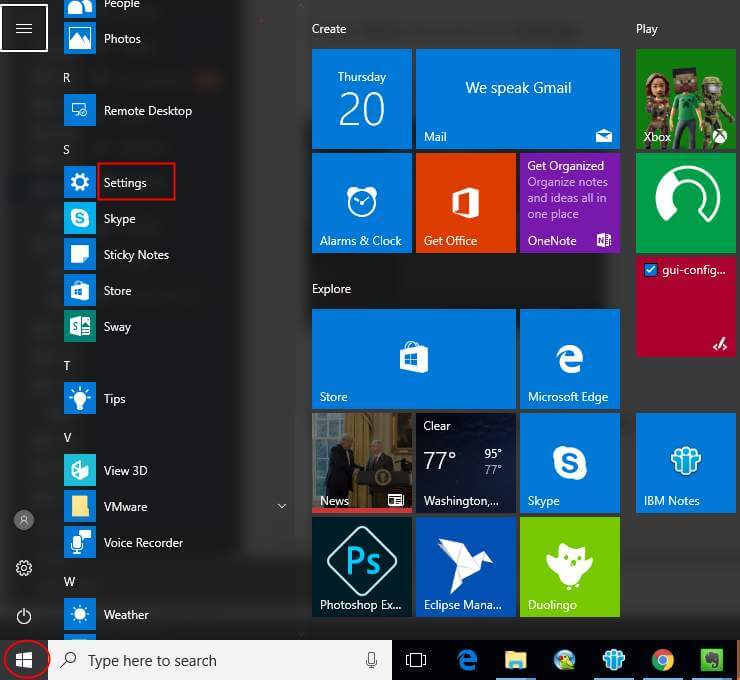
- Click Start menu > Settings.
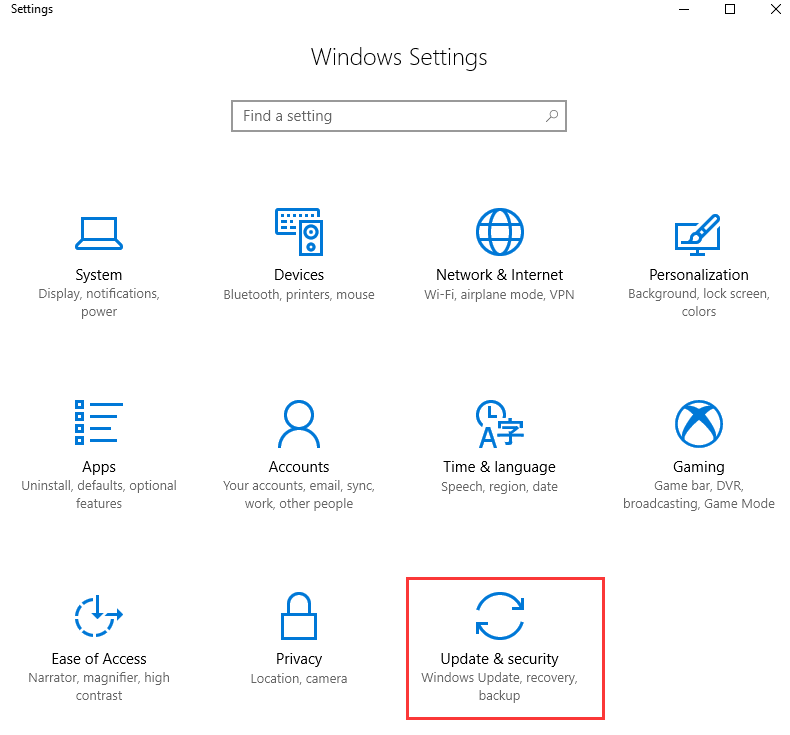
- Then in the Settings window > click Update & security.
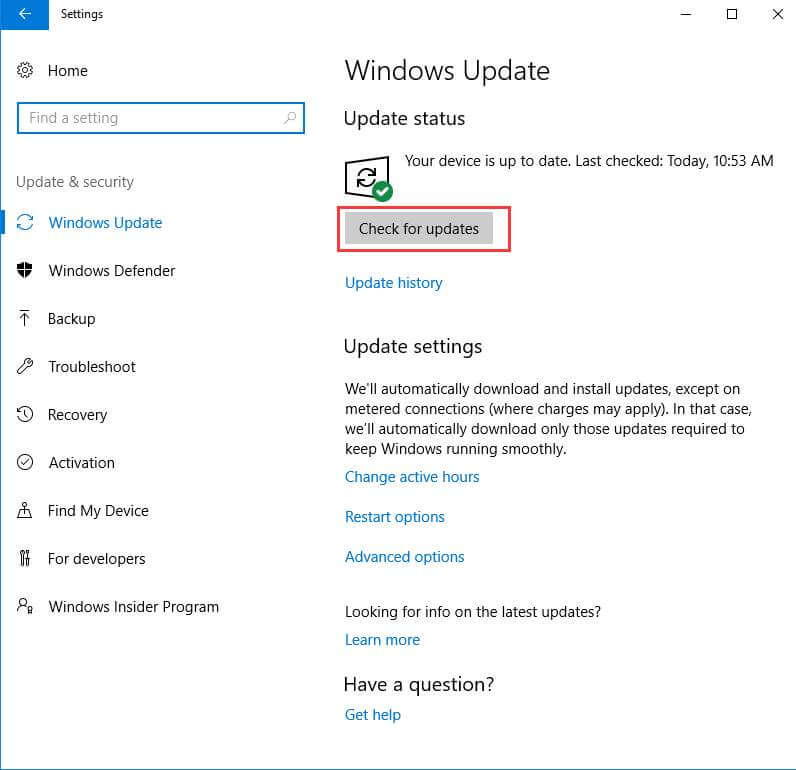
- And in Update & Security > in left pane click Windows Update
- Click Check for updates, and wait till Windows looks for the latest updates.
- Now click the link that shows optional updates are available. (If you won’t see the link then it means Windows Update won’t find any updates for your computer.)
- And choose the driver you want to install > click OK, > click Install updates.

No comments:
Post a Comment